
On a recent episode of Live With Annie, we shared some amazing projects made using patchwork. It was so much fun to see what our customers have made using everything from English paper piecing to orphan blocks left over from quilts!
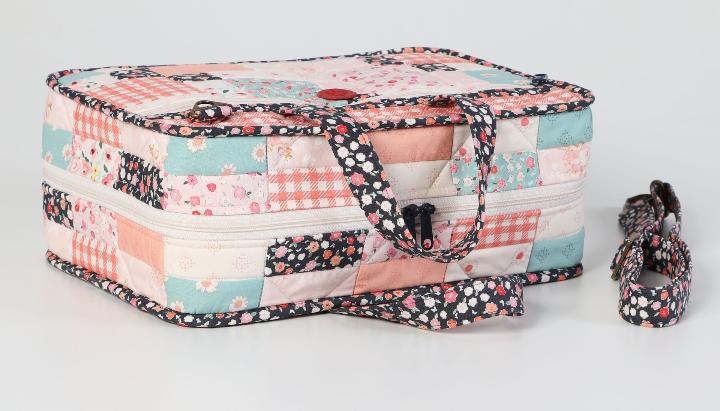
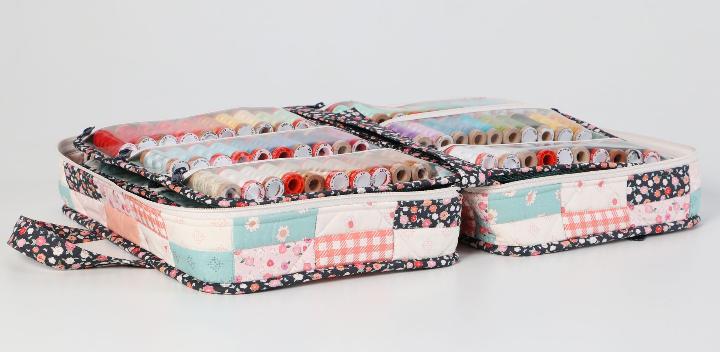
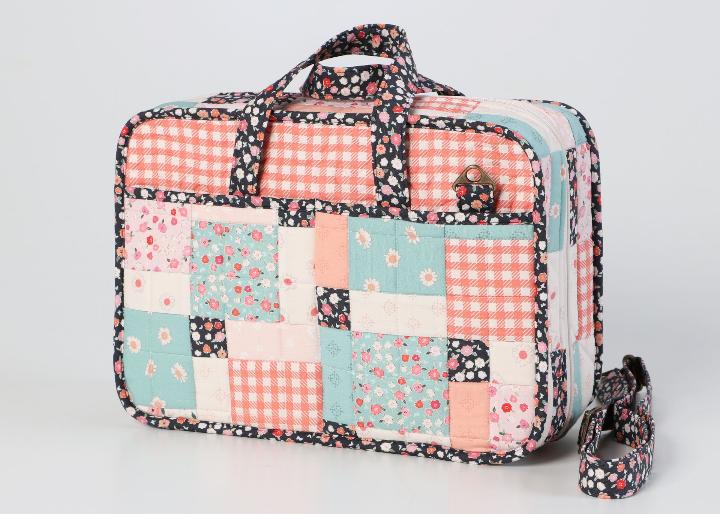
But the star of the show was Annie’s patchwork A Place for Everything 2.0 made with In the Afterglow by Minki Kim for Riley Blake Fabrics.
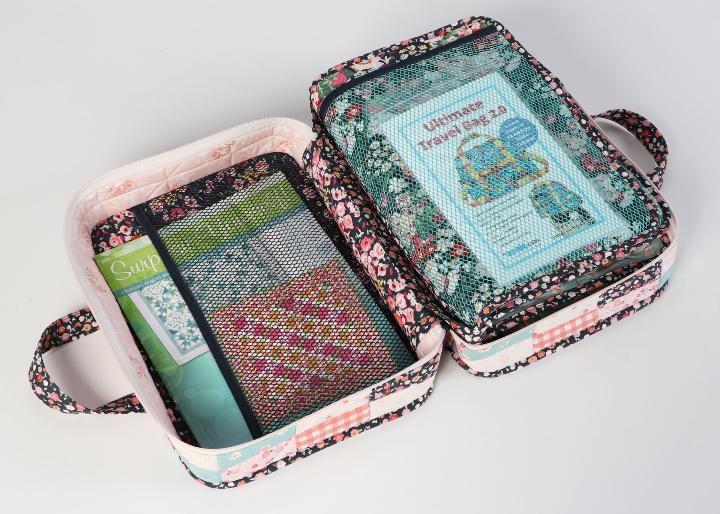
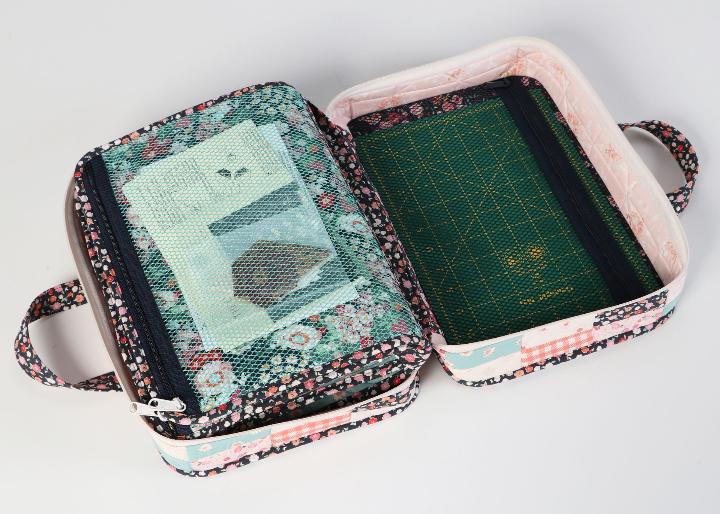
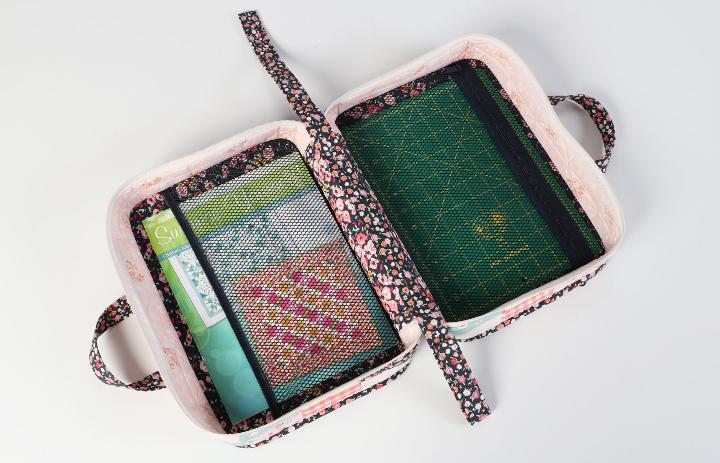
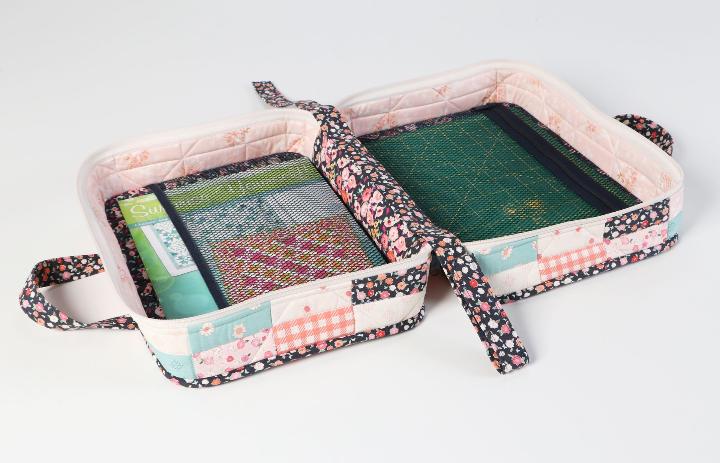
This spacious organizer stores and carries tools and supplies, providing visibility and easy access to everything.
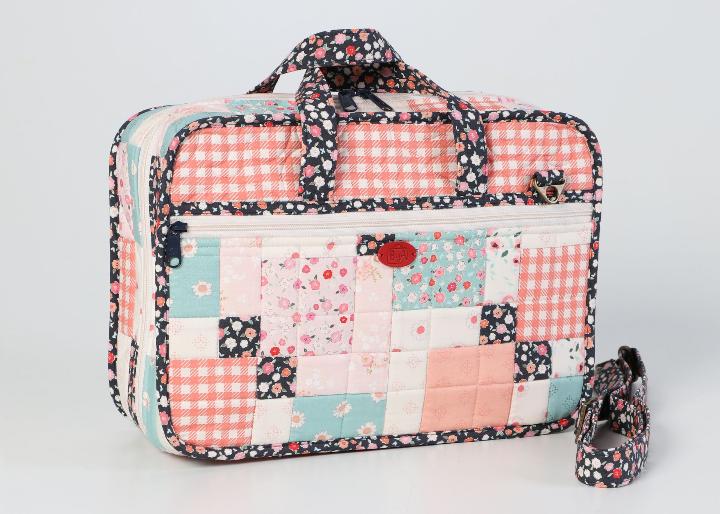
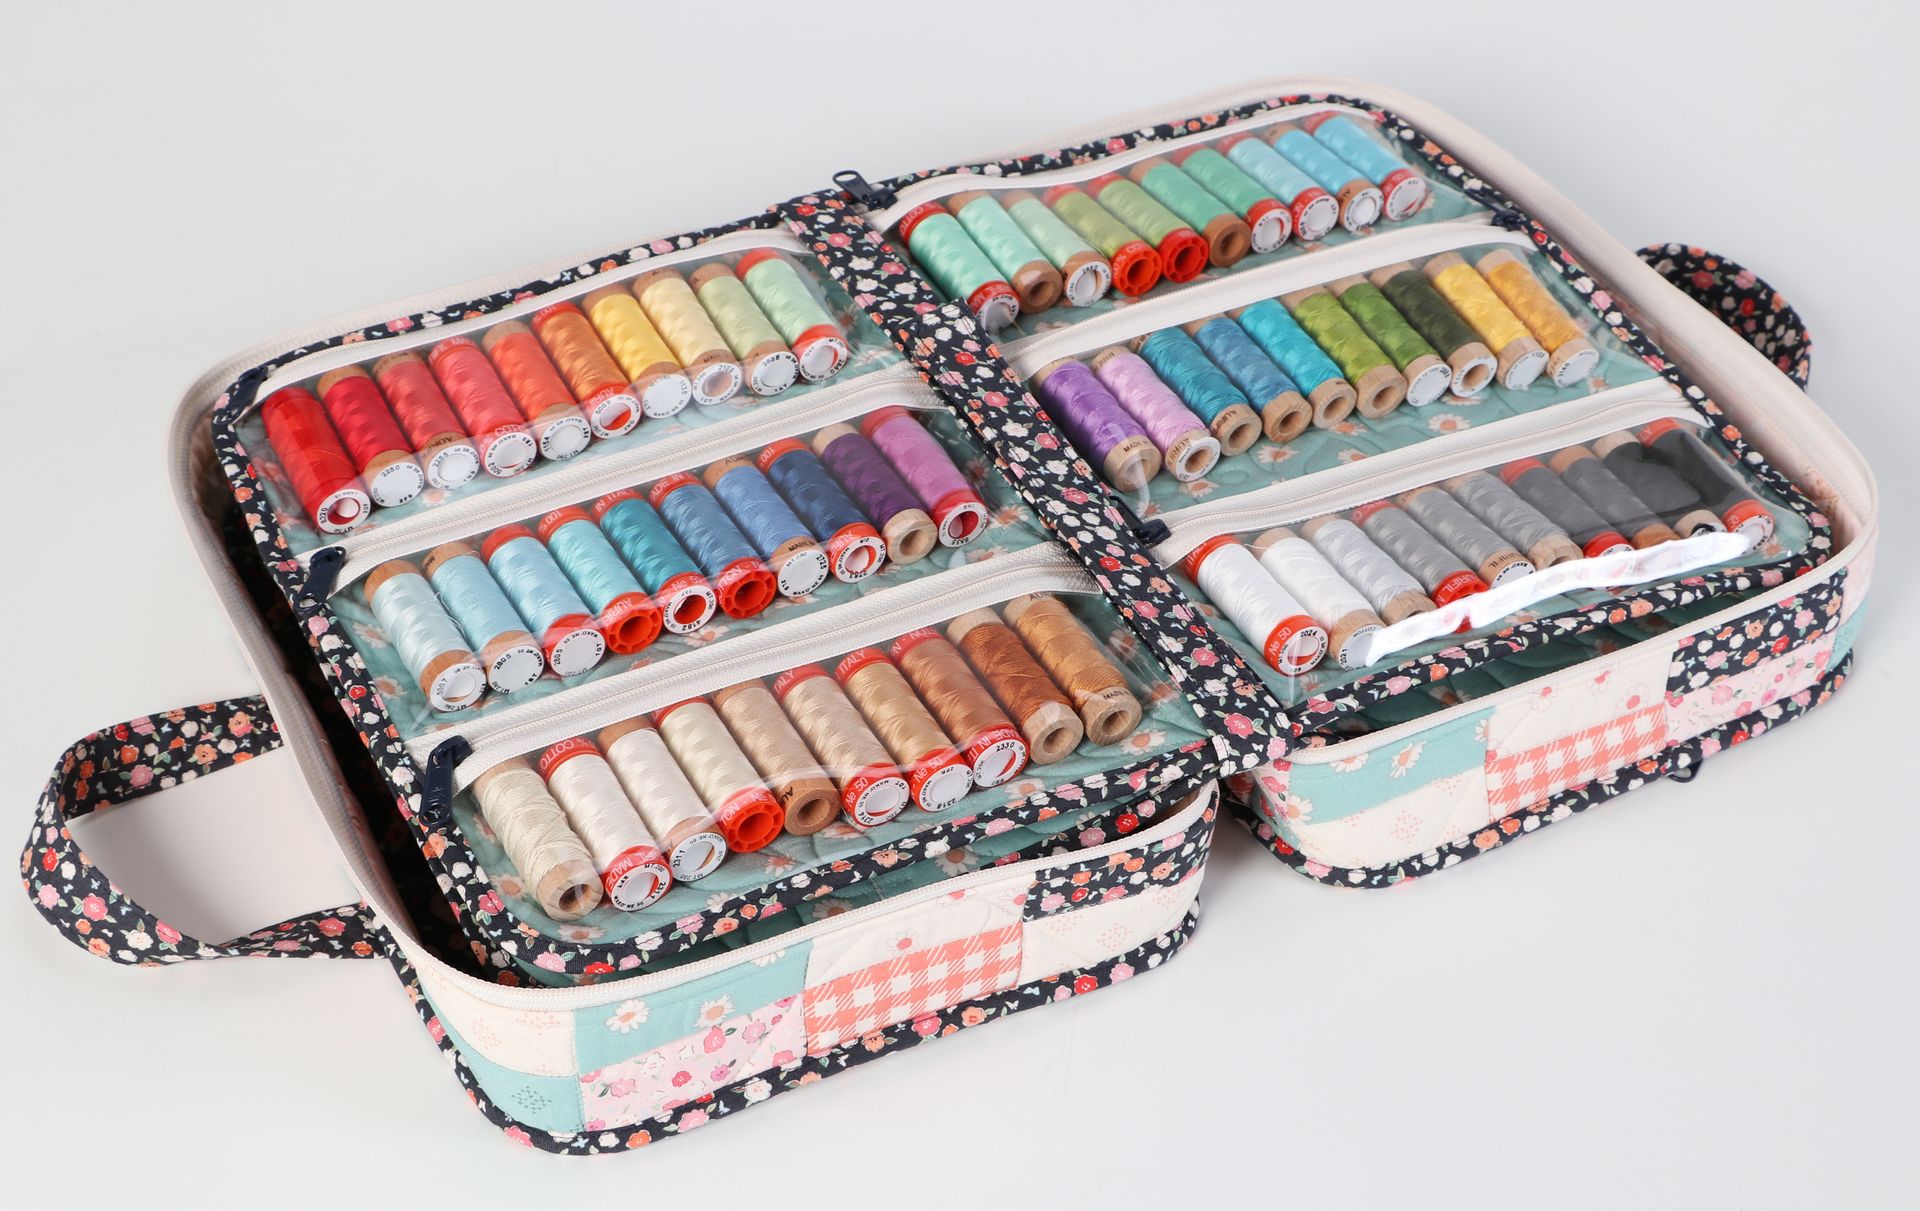
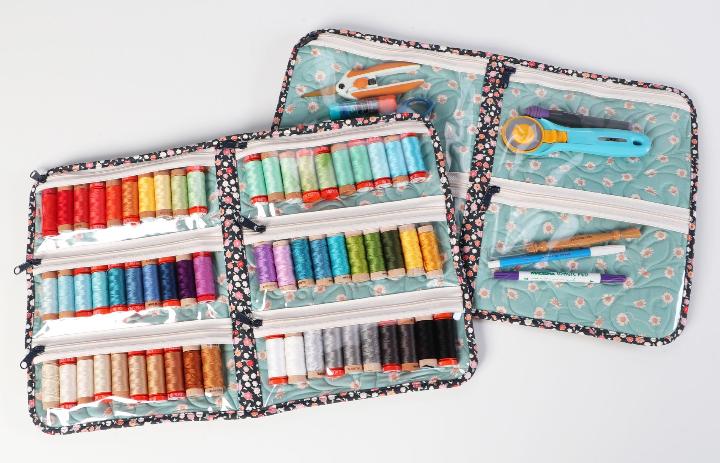
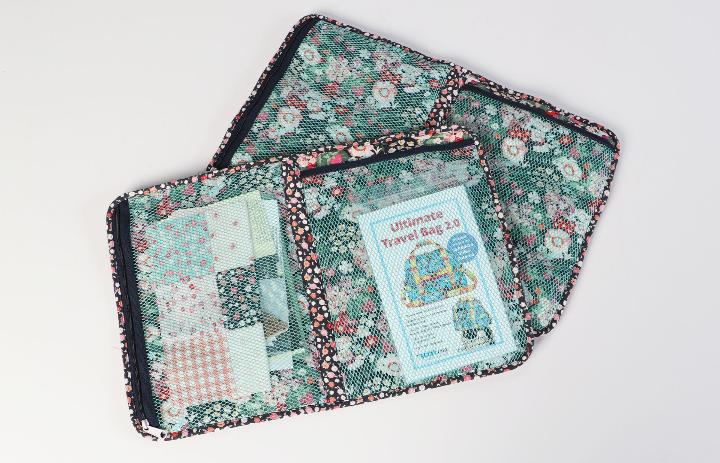
The bag features handles and an adjustable/detachable carrying strap along with two removable pocket pages with mesh or vinyl pockets in a variety of styles.

Abundant pockets in a variety of styles are the key to ensuring that there is a place for everything … and that everything is in its place!
Annie shared her process for using Disappearing Nine Patch blocks for her bag, and many viewers asked for more details about how she did this.
Here's what Annie had to say about this technique:
Disappearing Nine Patch is a fun way to make it look like you did a lot of work. . . without actually doing all that work!
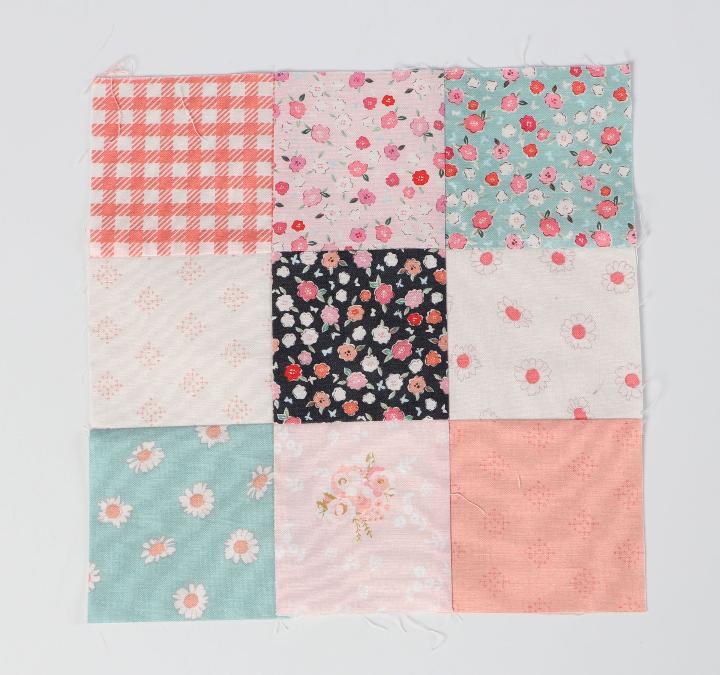
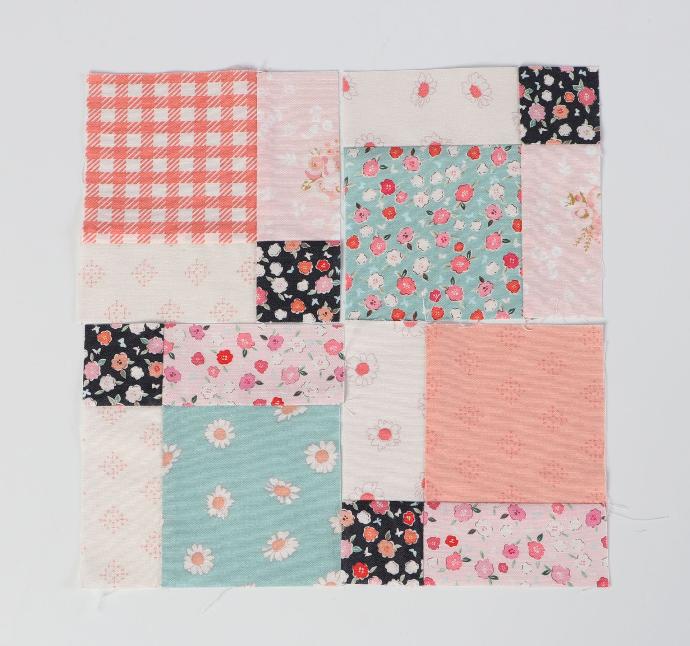
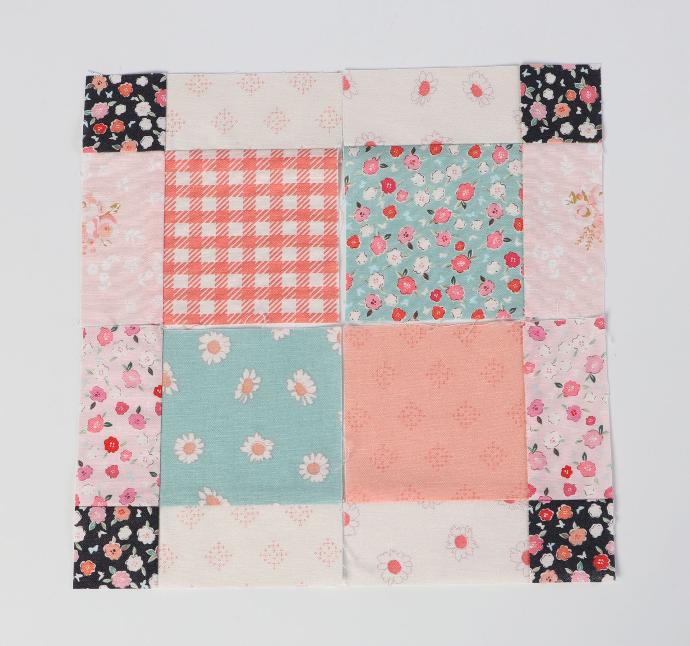
You start by making a 9 patch block.
Then you cut that block in half vertically and horizontally to make 4 smaller blocks, each with a big square, small square, and two rectangles.
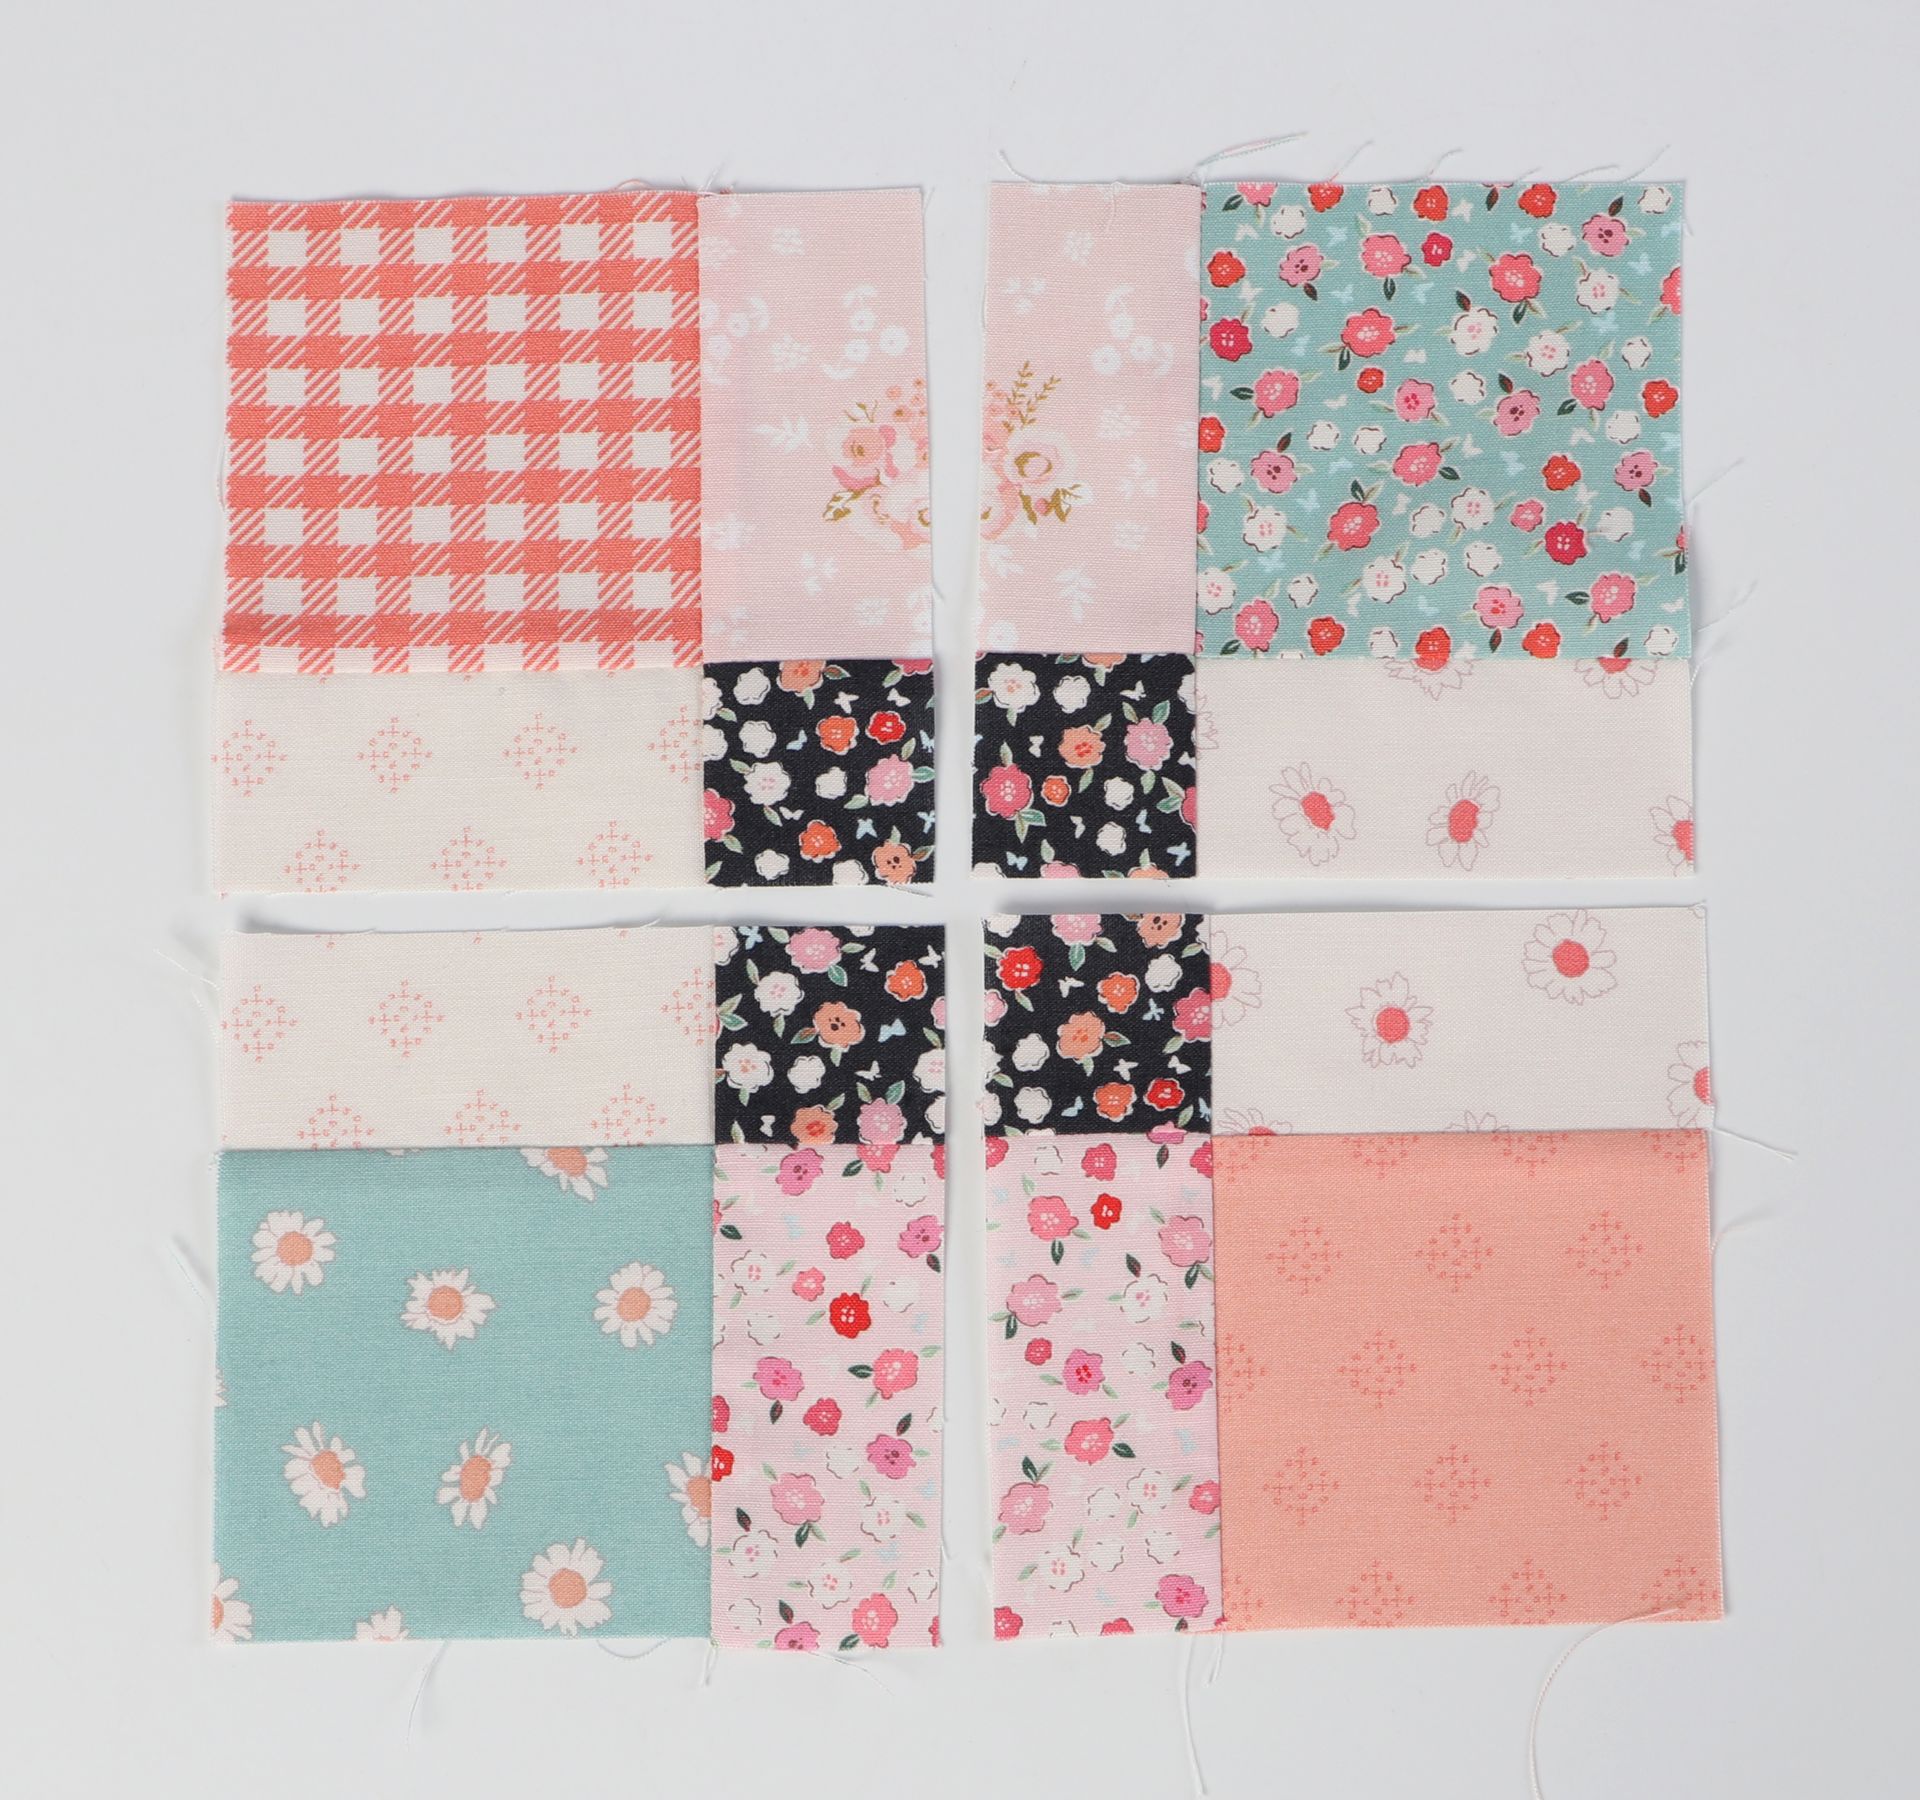
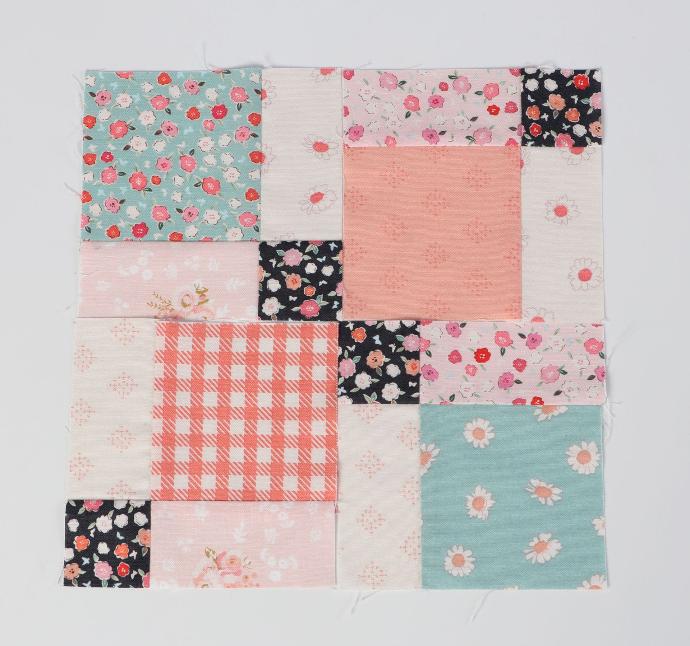
By rotating each block you can get a variety of effects.
If you’re making a quilt using this technique, you can use 5” charm squares or even 10” layer cake squares to make the 9 patch. However, for a project of this size, both of those would make blocks that would be way too big.
I knew that I needed a piece about 9”H x 16”W to quilt for each pocket, so I sat down and calculated what size square I needed to start with to arrive at blocks of that size.
I found that if I made Nine Patch blocks using 3.5” squares, I would end up with Disappearing Nine Patch blocks measuring 9” square. Two of those sewn together would be about 9” x 17” which could be trimmed to the sizes I needed. I’d waste a little on the side, but I was okay with that.
I started by choosing fabrics and ended up picking two medium blues, two medium oranges, one dark navy multi print, and four light neutrals. From those 9 fabrics, I cut 3.5” strips across the width of the fabric.
I then subcut each of those strips into 3.5” squares. I got 12 squares from each strip for a total of 108 squares.
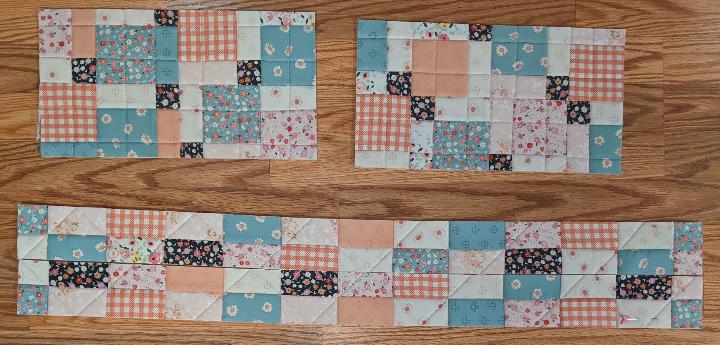
I started by making the four Disappearing Nine Patch blocks that I’d need for my pockets.
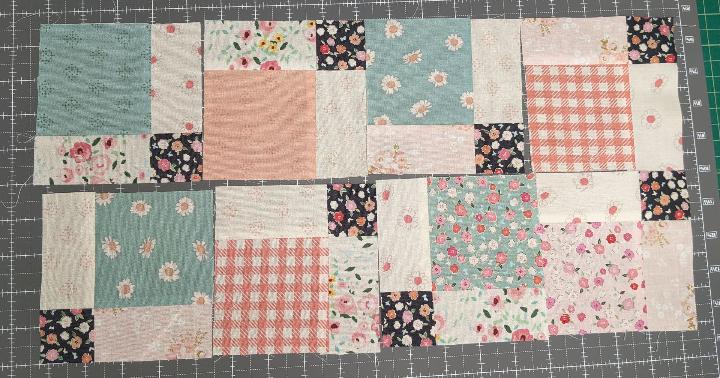
Those blocks used 36 of the 108 squares, so I had quite a few squares leftover to make the Zipper Strip. For that strip, I needed a piece about 8” x 37” to quilt.
To keep things simple, and since I had lots of 3.5” blocks left over, I sewed 13 rows of 3 blocks together to make a strip that measured about 9.5” x 39.5”
That used 39 squares, so there were still 33 blocks left. I could probably use those and perhaps add a border to make an Easy Does It or other small bag.
After everything was pieced, I layered the fabrics with Soft and Stable and lining and pinned them to hold.
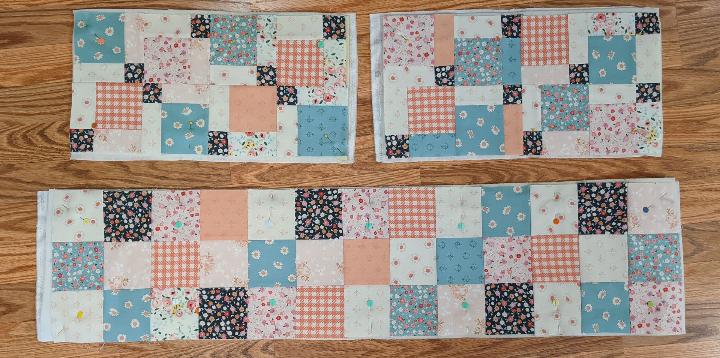
Then I quilted each set using white thread. I set my machine on a stitch length of 3.3 and used my walking foot to stitch in the ditch and then add some additional lines of stitching. I adjusted my presser foot pressure to about 50 and found it easy to quilt through all the layers.
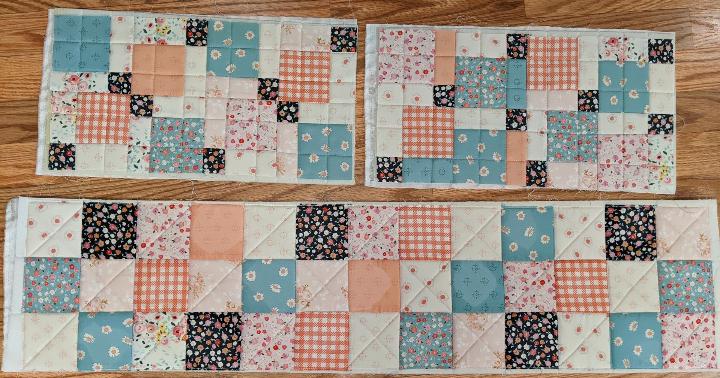
Then it was time to trim the pieces to the proper size. When trimming the zipper strip, I cut down the middle of the center squares and then rotated the pieces so that the fabrics in the center didn’t match. I thought that made it a bit more interesting.
Once the pieces for the front and back pockets and zipper strips are cut from the quilted fabric, the process is exactly the same as normal for assembling the project.
Adding some piecing is a great way to add some interest to the project, incorporate more fabrics, and to use up your stash.
We hope you enjoyed seeing Annie’s patchwork A Place for Everything 2.0 and that you are feeling inspired to add some patchwork to your next ByAnnie project.
Please join us for the next episode of Live With Annie. We will continue sharing various ways to incorporate patchwork.
Also, please share photos of your work by entering our monthly Photo Contest. We can’t wait to see what you have made!
Here are a few more pictures of the A Place for Everything 2.0 bag for you to enjoy. If you would like to make your own A Place for Everything 2.0 bag, you'll find all the information at our website. Be sure to click on the Supply List tab on the product page to find a list of all the supplies you will need.
PATCHWORK: A PLACE FOR EVERYTHING 2.0