Welcome to the ByAnnie blog! We are so excited to be a part of the Benartex Precut Project Hop and had so much fun playing with 'Bonnie Lane' by Pat Sloan from Benartex.
The moment these fat quarters and jelly roll pre-cuts graced our doorstep, we knew we had to make a set of placemats with them. Our placemat patterns are fantastic for utilizing these precut fabrics in a quick and time-efficient way. And, our Soft and Stable Project Packs include four PRECUT pieces which are perfect for placemats. Win-win!
Fun with fat quarters and jelly rolls.
A word on jelly rolls and fat quarters. What are they and why are they so amazing?
A fat quarter is a ¼ yard cut of fabric that measures about 18” x 22”. When a fat quarter is cut, you begin by cutting a ½ yard of fabric, cutting 18” along the fabric’s lengthwise grain. Then you cut that piece in half at the crosswise middle. This type of cut allows you to get a ‘fat’ quarter yard of fabric. Lots of stores offer pre-cut fat quarters for your convenience!
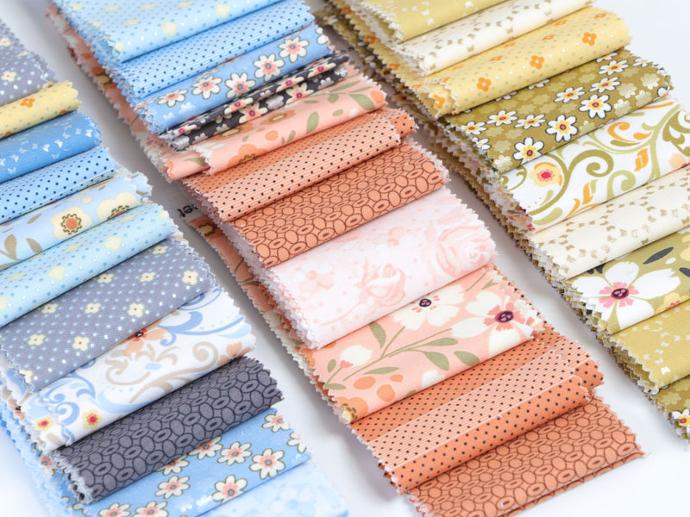
A jelly roll is a collection of 2½” x 42” strips of fabric. Usually, there are about 40 strips of fabric in a jelly roll, but that number can vary.
ByAnnie has many projects you can make using fat quarters or jelly rolls. Some of our favorites are Petit Four Baskets, Clam Up, Pleated Log Cabin, and of course, our placemat patterns.
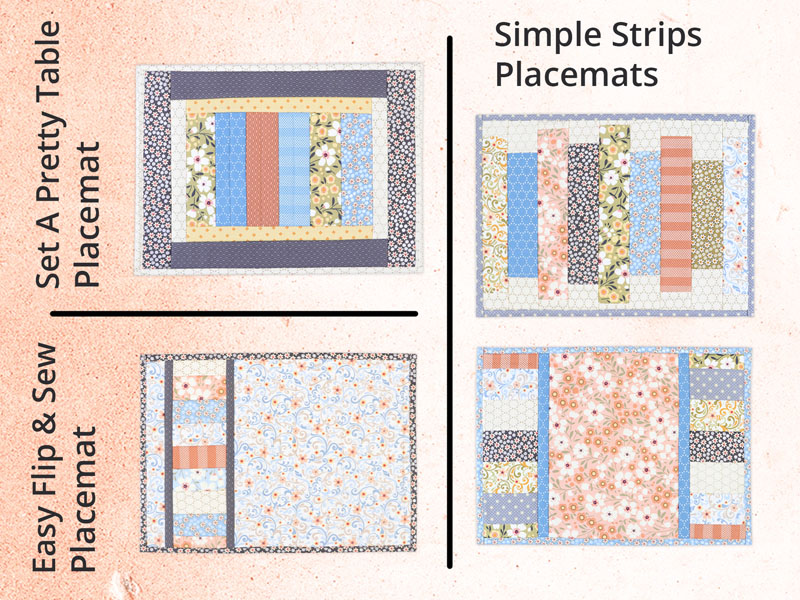
We made placemats!
We offer a few different placemat patterns: Set a Pretty Table, Simple Strips Placemats, Table For Four, and Easy Flip and Sew Placemats.
Because we couldn’t decide which was our favorite, we decided to make one or two placemats using several of these patterns.
These projects are easy and fast to make. Perfect for sewists of all experience levels who have precut fabrics to use or a dining room to spruce up!
Best of all, these placemats are easy to make with our Soft and Stable Project Pack.
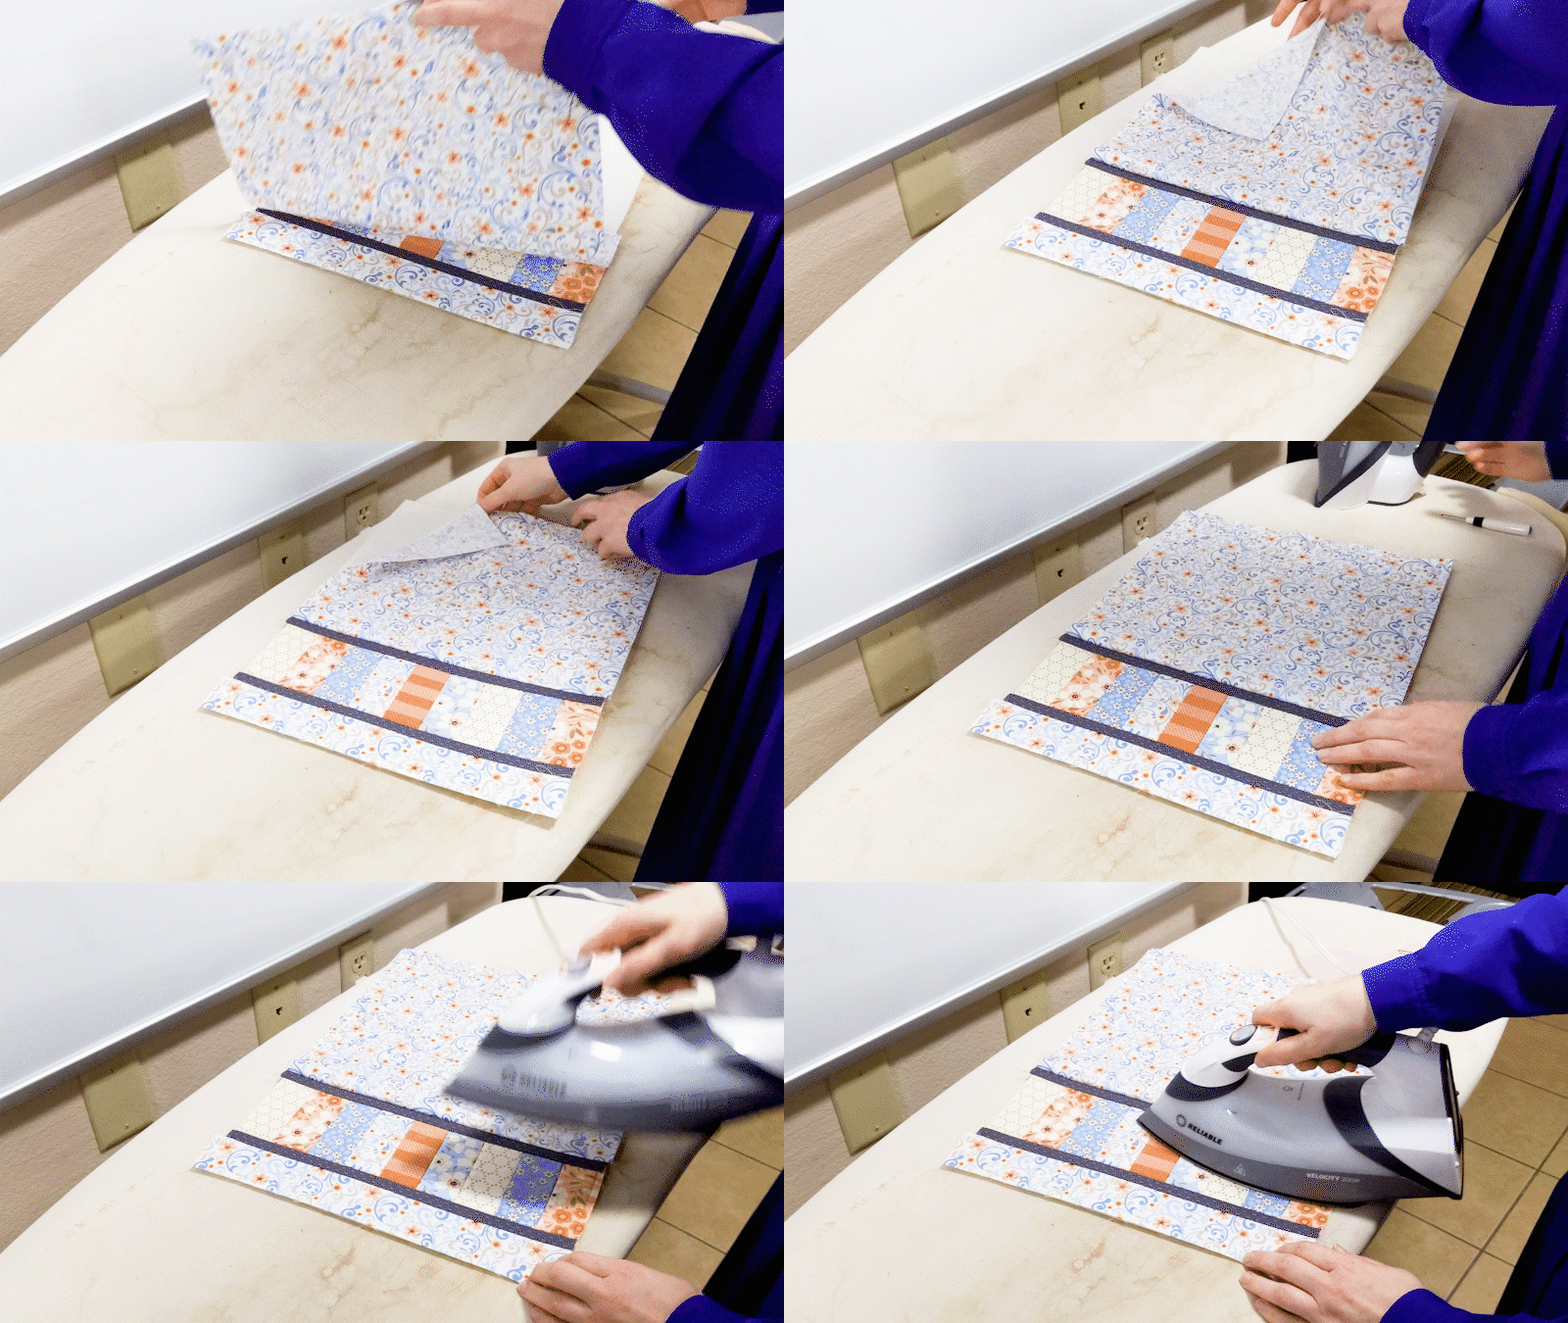
Using Soft and Stable as the foundation makes construction extra easy. Because the front is sewn directly onto the Soft and Stable without the backing in place, those stitching lines won’t show on the back (shown at right).
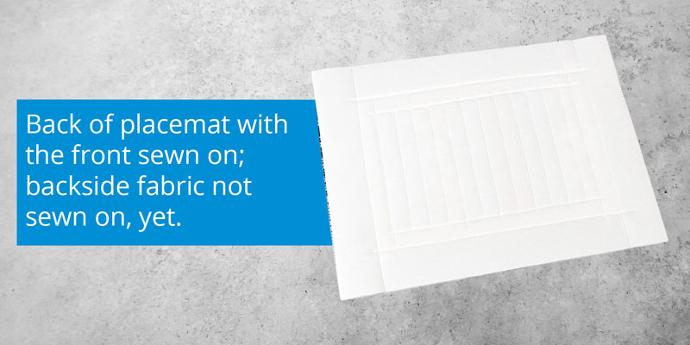
The backing, which is attached after the front is assembled and trimmed, folds around to the front to make an extra-easy binding.
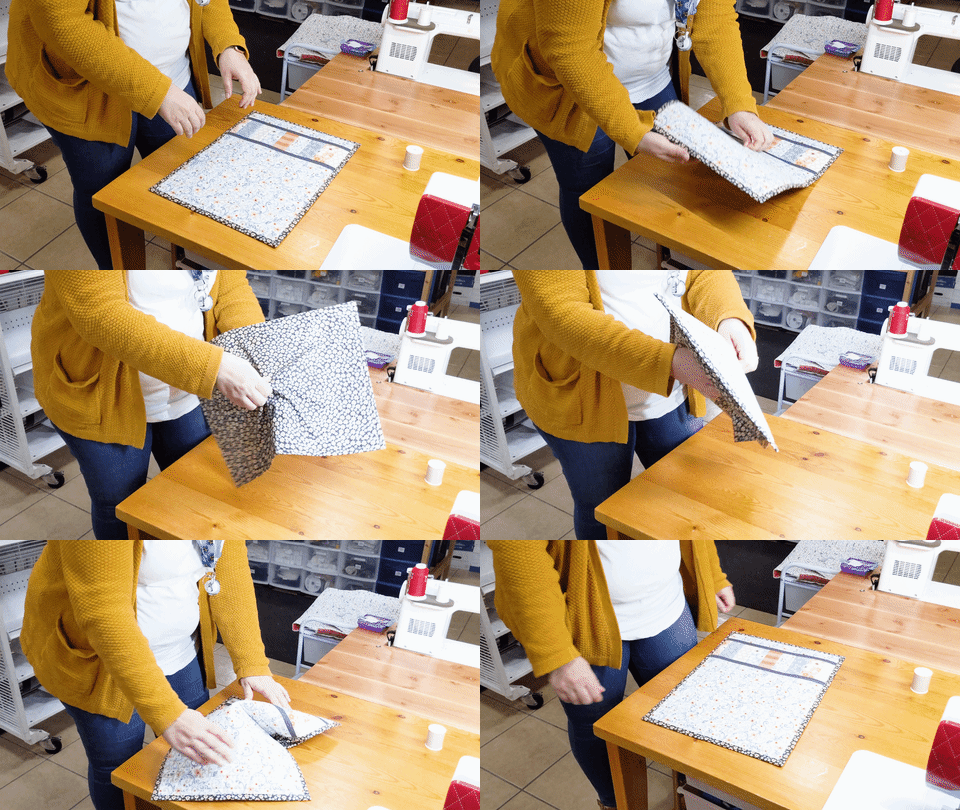
As you can see (Mindy demonstrating at left) the front of the placemat isn't sewn through to the back. This method of construction saves lots of time and gives the entire placemat a smooth and professional-looking finish.
In addition to their quick and easy construction, we especially appreciate the wearability of these mats which we accomplished by using ByAnnie’s Soft and Stable as the foundation. The Soft and Stable allows you to simply throw the placemat in the washing machine when it gets soiled, making cleaning a breeze. It won’t get wrinkly or deformed like mats made with cotton batting. If you want to crisp it up, a quick press with your iron will do the trick.
First things first.
Obviously, our first step in making a placemat was to choose which placemat to sew. We made placemats using more than one pattern to showcase the fabric, but for the sake of simplicity we focused on giving a peek behind the process of sewing our Easy Flip and Sew Placemats pattern.
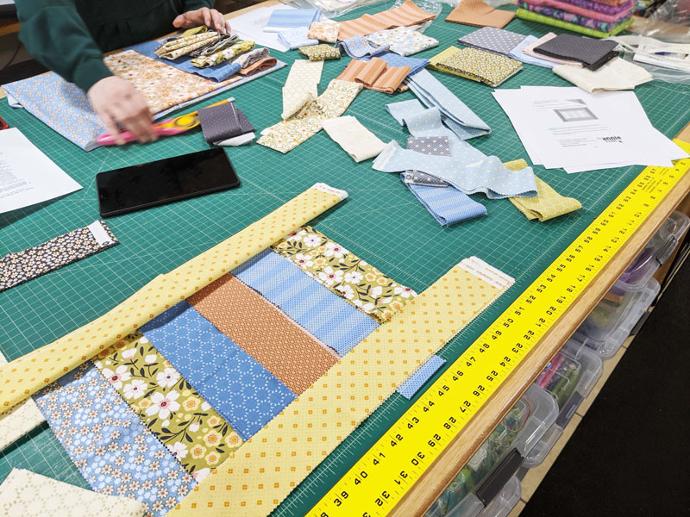
Next step? Fabric!
We had a lot of fun opening up the jelly roll and fat quarter bundle and placing them all over the table to get a good view of our color and design options.
The beauty of using fabrics within the same fabric line is that the different fabrics were designed to look nice together, so the color-matching aspect is already taken care of.
Need tips on how to match/choose fabrics? Check out this blog post we wrote on the topic.
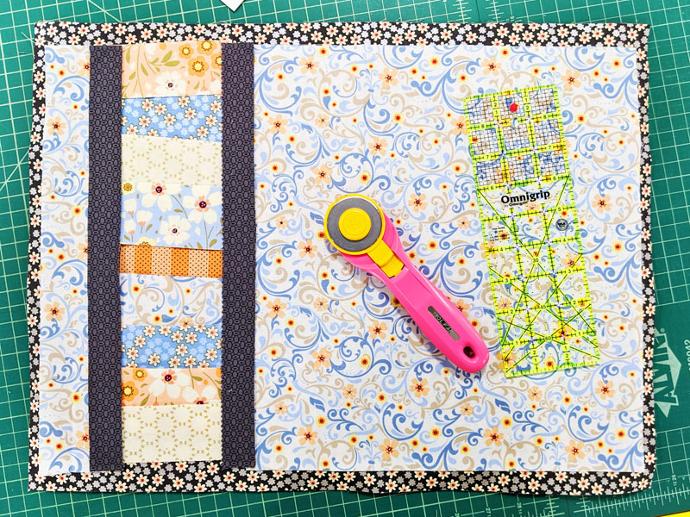
Once we settled on which fabrics we wanted to use and had the individual pieces cut, we rearranged them on our table to get a clear visual of what the finished placemat could look like (shown at right).
This is very similar to organizing the pieces of a quilt before sewing it together.
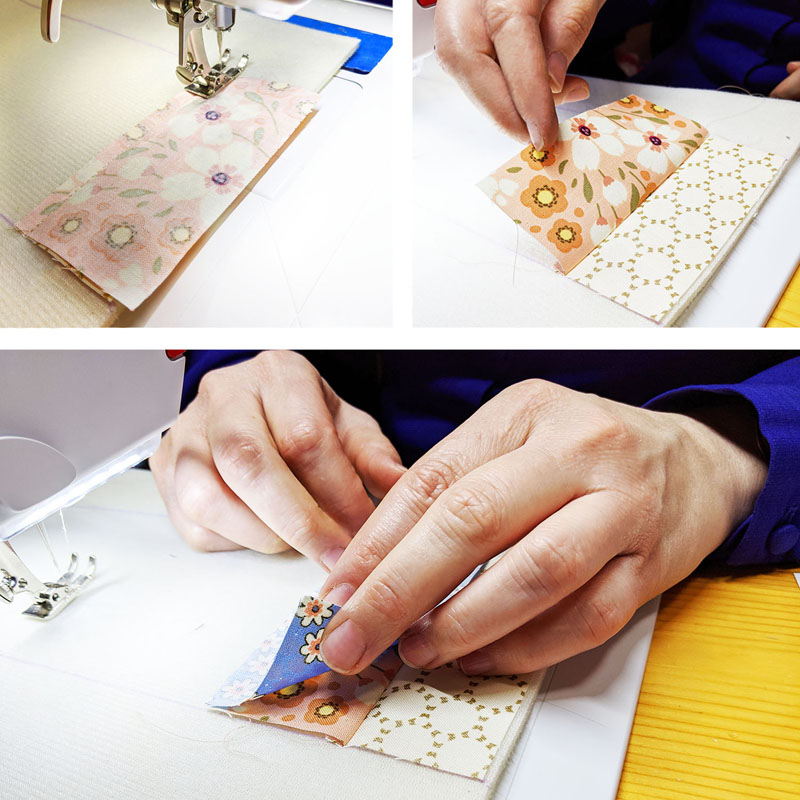
Sew ready!
We already mentioned that the beauty of our placemats is that you sew the front fabrics onto the Soft and Stable before attaching the back, to avoid the stitch lines showing through when the mat is finished.
This technique makes the finished placemat look sharp — on both sides!
The jelly roll precuts were fantastic for the design of Easy Flip and Sew Placemats. The jelly roll strips are already cut to the size needed for most of the pieces.
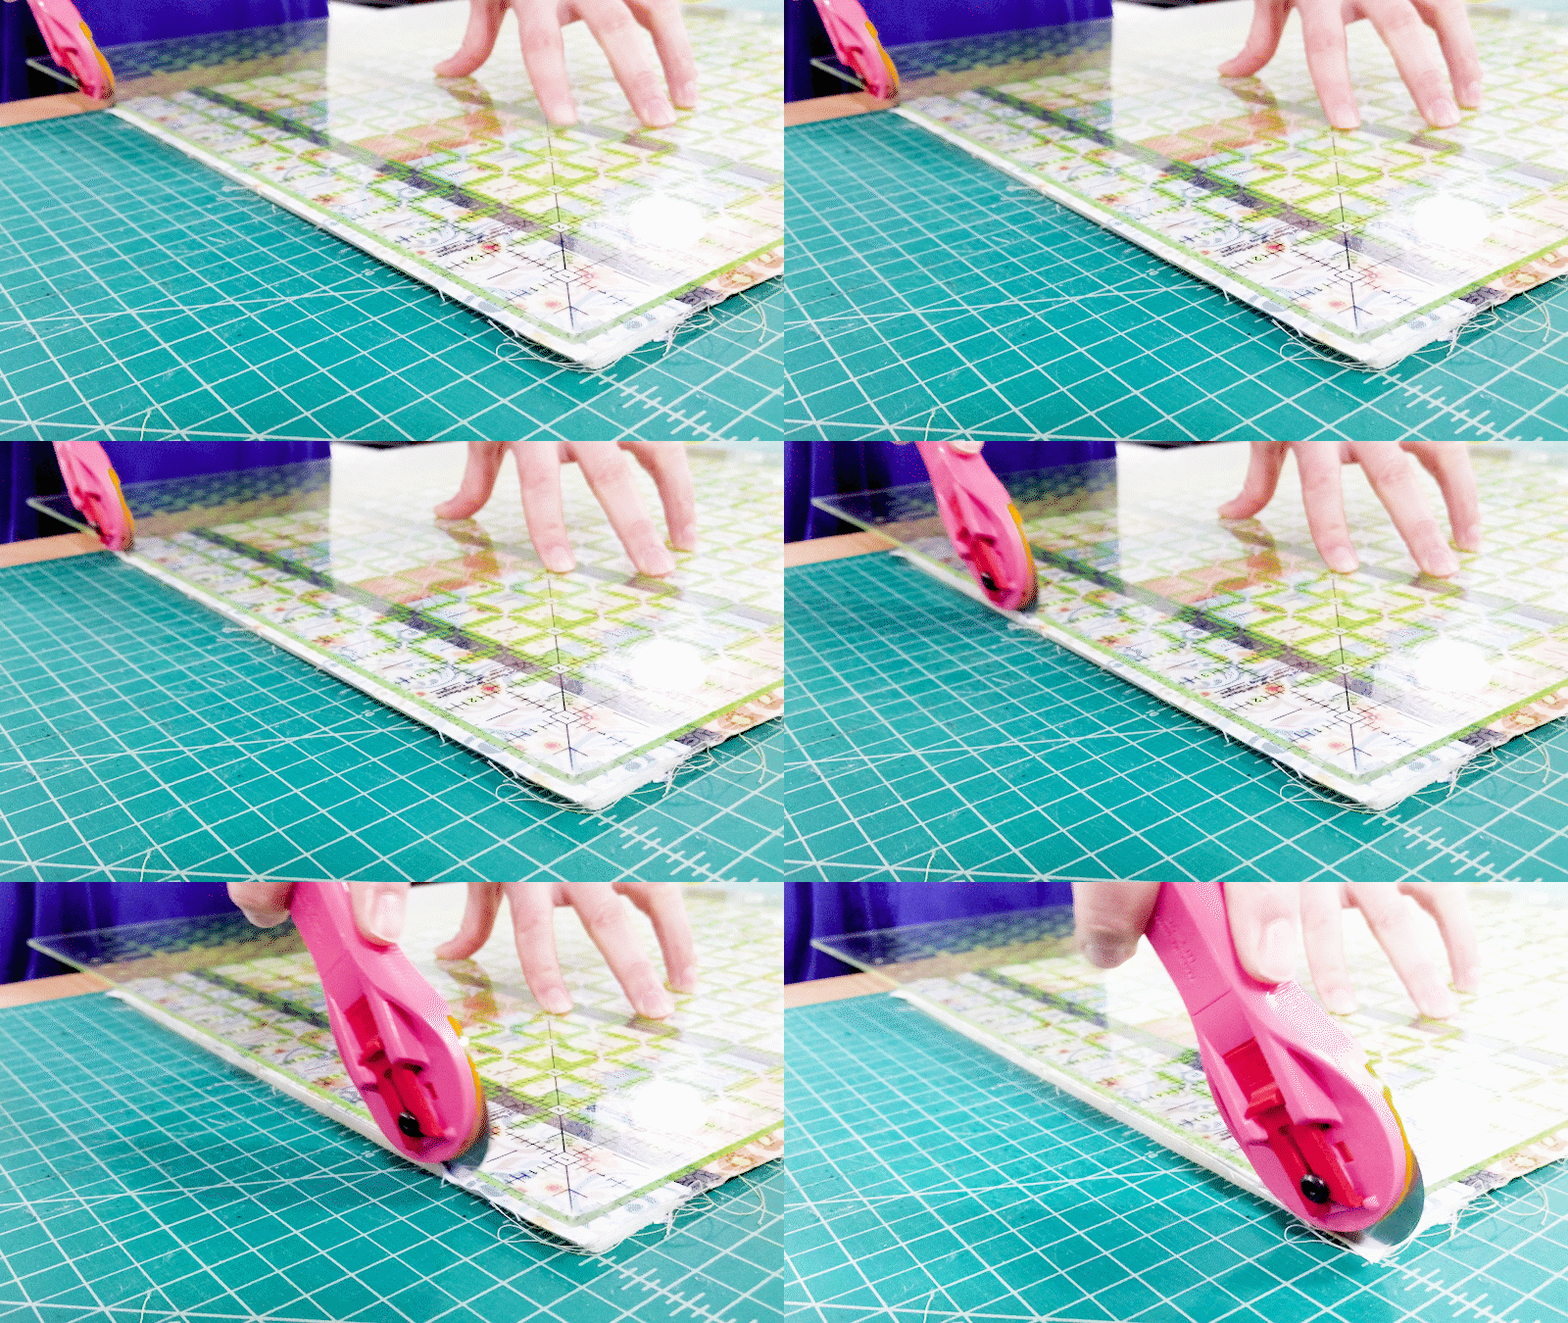
It was easy to trim the handful of border pieces to the correct size needed for the pattern. Fat quarters were perfect for cutting the larger pieces used on each mat.
The process for sewing the strips to the foundation is simple and explained well in the pattern.
If you’re attempting this pattern, we provided a couple of images (at left and elsewhere in this post) showing Angela attaching these strips onto the Soft and Stable as a helpful visual.
Easy? Flip and sew?
This placemat is aptly named Easy Flip and Sew Placemats because it’s easy and you ‘flip and sew.’ As you work through this pattern, you repeat the ‘flip and sew’ motion nearly from start to finish.
How easy is it? Annie told us, “My friend Ricci (who worked full time) had guests coming for Saturday night dinner. That day she cleaned the house, prepared dinner, AND sewed a four set of placemats — all before her dinner guests arrived.”
Pair that with the fact it took Angela (the staff member sewing the placemat for this blog) precisely an hour to sew this placemat while taking breaks for photos of the process, and it was her first time sewing the pattern.
If you’re new to sewing, this is a great project to hone your skills. Sew them as a housewarming gift for a friend, for a themed dinner party, or in holiday fabrics for festive occasions. If you’re a more experienced sewist, sewing placemats would be a great teaching project to sew with an interested friend or grandchild.
Tip and tricks.
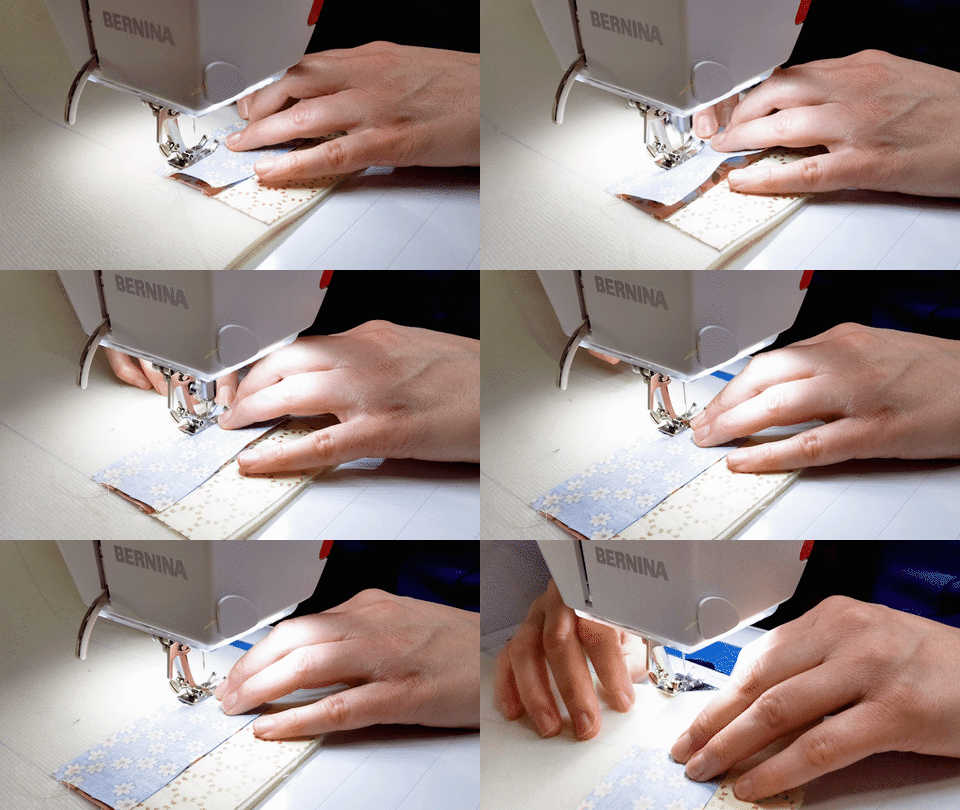
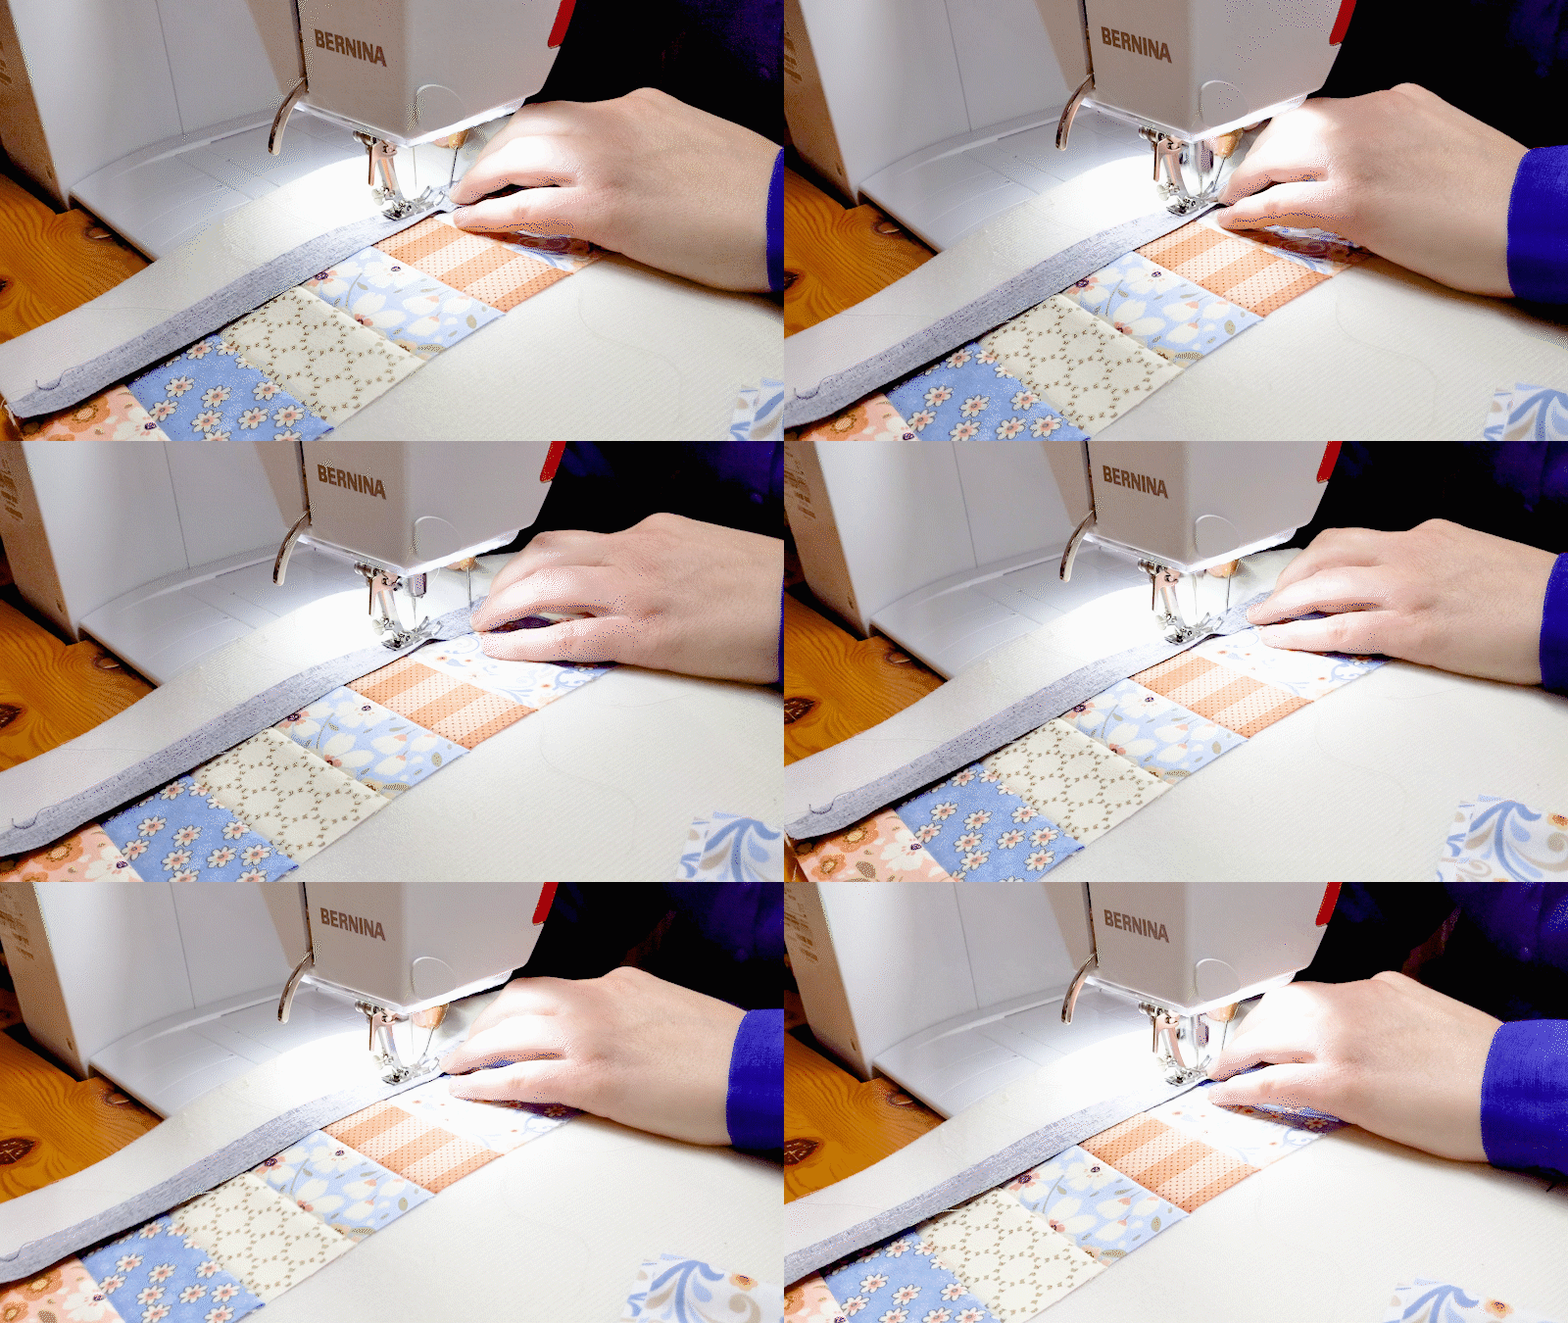
We recommend using the ByAnnie Stiletto and Pressing Tool when lining up your fabric pieces and sewing them onto the Soft and Stable.
As you can see (at left), Angela uses the grippy end of the stiletto to give herself a little extra precision as the fabric goes under the foot.
This also mimics the action of a walking foot and keeps the fabrics from stretching and growing as you sew.
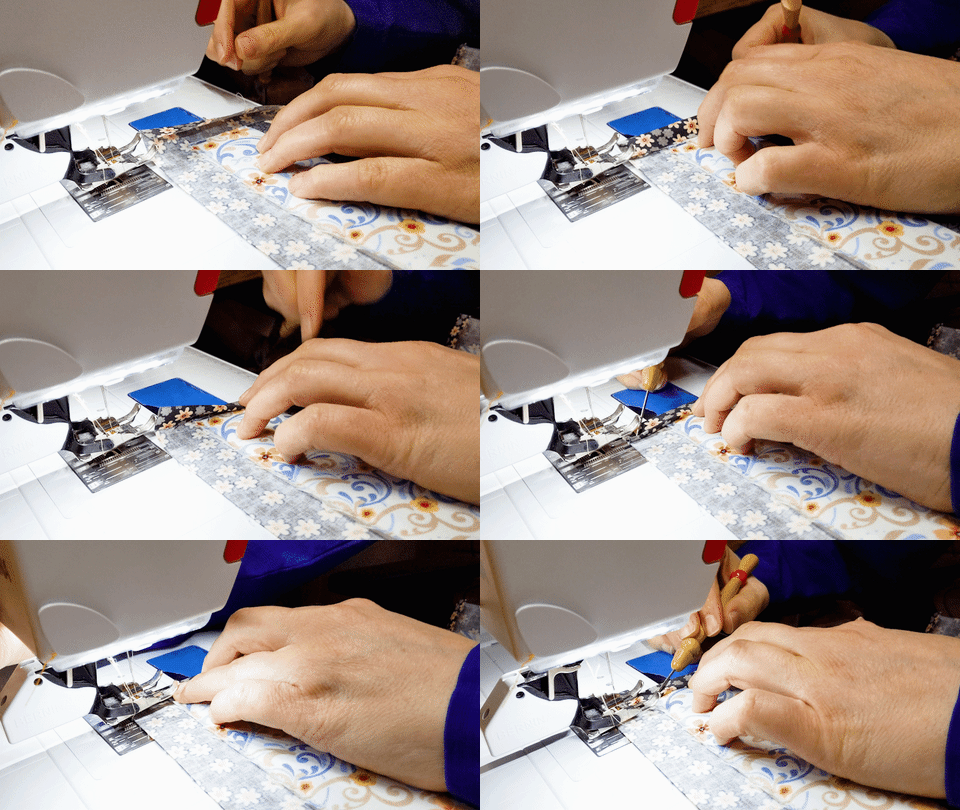
This tool is also especially helpful for attaching bias binding on any projects with bound edges.
This project doesn’t use bias binding, but the stiletto works well when folding over and holding the faux binding in place as you sew (at left).
Another trick (which we’ve already mentioned) is to use ByAnnie’s Soft and Stable as a stabilizer.
We love Soft and Stable because it isn’t fusible, but has a slight ‘nap’ to the surface which allows fabric to stick to it (see Casey demonstrating at right).
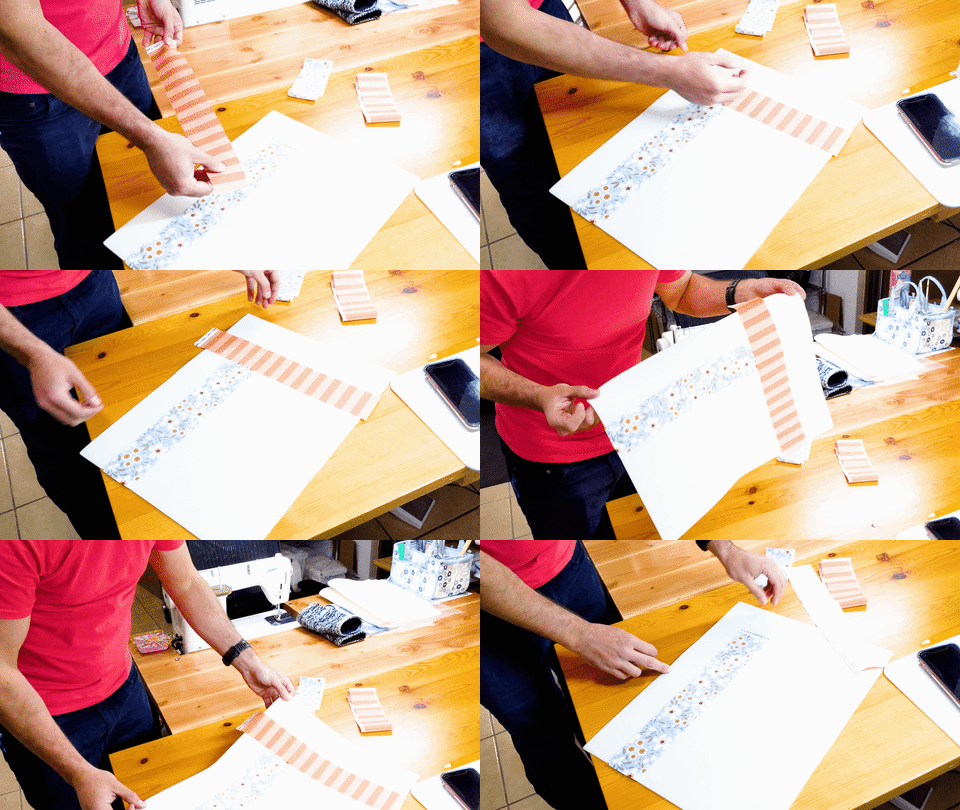
Similar to a flannel-graph, there’s just enough grip between the stabilizer and the fabric so you don’t need to glue them down and you can move them if need be.
We used pre-cut pieces of Soft and Stable from our Project Packs to make the mats. Each package includes four 13” x 18” pieces and are perfect for making a set of four placemats!
In addition, the Soft and Stable allows you to wash your placemat when it needs cleaning.
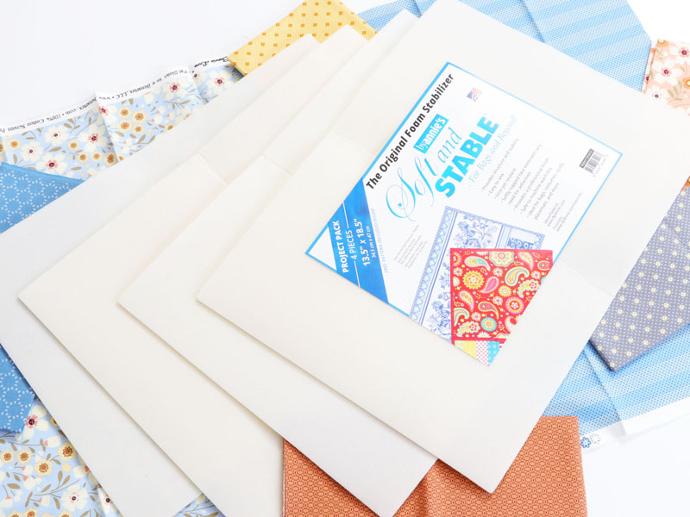
Because Soft and Stable doesn’t use adhesives and because it is a firm and resilient foam, the placemat won’t be all puckered and wrinkled when it comes out of the washing machine. And you can press it with an iron to crisp it up. Isn’t that fantastic!
To wrap it up...
In conclusion, our placemat patterns make a great beginner project for anyone new to sewing, new to sewing with Soft and Stable, or for anyone looking to give their table a fresh look.
Once you sew them, don’t forget to submit them to our Monthly Photo Contest!
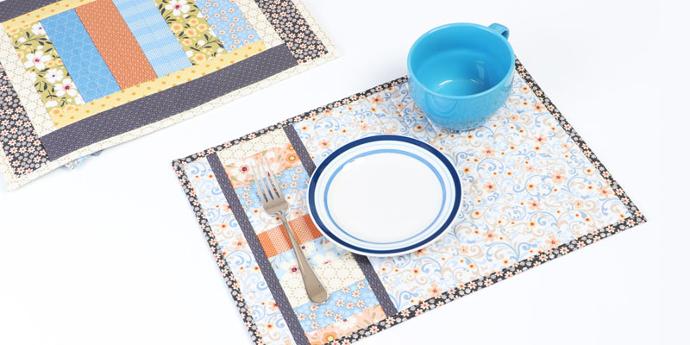
A special thanks to Benartex for including us in their blog hop and for sending us these beautiful fabrics. They were a dream to work with.
With the small prints and well-coordinated colors, they would work well for any number of our small projects or as a jelly roll-friendly quilt.
Want to follow along with the blog hop? Here’s the schedule!
Monday (2020-03-16)
Tuesday (2020-03-17)
Wednesday (2020-03-18)
Thursday (2020-03-19)
Friday (2020-03-20)
Saturday (2020-03-21)
Happy stitching!
Sunday (2020-03-22)
Monday (2020-03-23)
Tuesday (2020-03-24)
Wednesday (2020-03-25)
Thursday (2020-03-26)
Friday (2020-03-27)
Precut Project Blog Hop 2020